
Pour Your Heart Out
tips for pouring a heart in your home lattes ♥️

Happy Valentine’s Day! For obvious reasons, Valentine’s makes me think of hearts, and what better way to celebrate love than to pour a heart in your latte for your partner (or yourself)!
Making good latte art at home can be pretty tricky, so first, NO SHAME if you’ve been finding it difficult. Second, keep reading for tips to improve your latte art and learn the first and most basic shape that we teach new baristas at the cafe.
Step 1: Start with Good Milk
To get a little science-y, the way microfoam is created in milk is when air bonds to fat molecules in the milk. The higher the fat content, generally, the easier it will be to achieve a good milk texture.
Milk types matter:
Whole milk is the easiest. The fat content makes it naturally creamy and forgiving. Nonfat can be especially tricky, but lowfat can be a good secondary option for dairy drinkers.
Oat milk can steam beautifully, especially “barista” versions (these add the necessary fat to make steaming easier).
Almond milk and other alternatives (pistachio, macadamia, etc) are lighter and a bit trickier, but still workable.
If you’re just starting out, whole milk will give you the most consistent results.
Fill your pitcher just below the bottom of the spout. This gives you enough milk to create a whirlpool without overflowing. Some pitchers come with lines to indicate where to fill the milk, so follow these markers if yours has them.
Step 2: Add Air (Just a Little)
This is where most people go wrong — they add too much air.
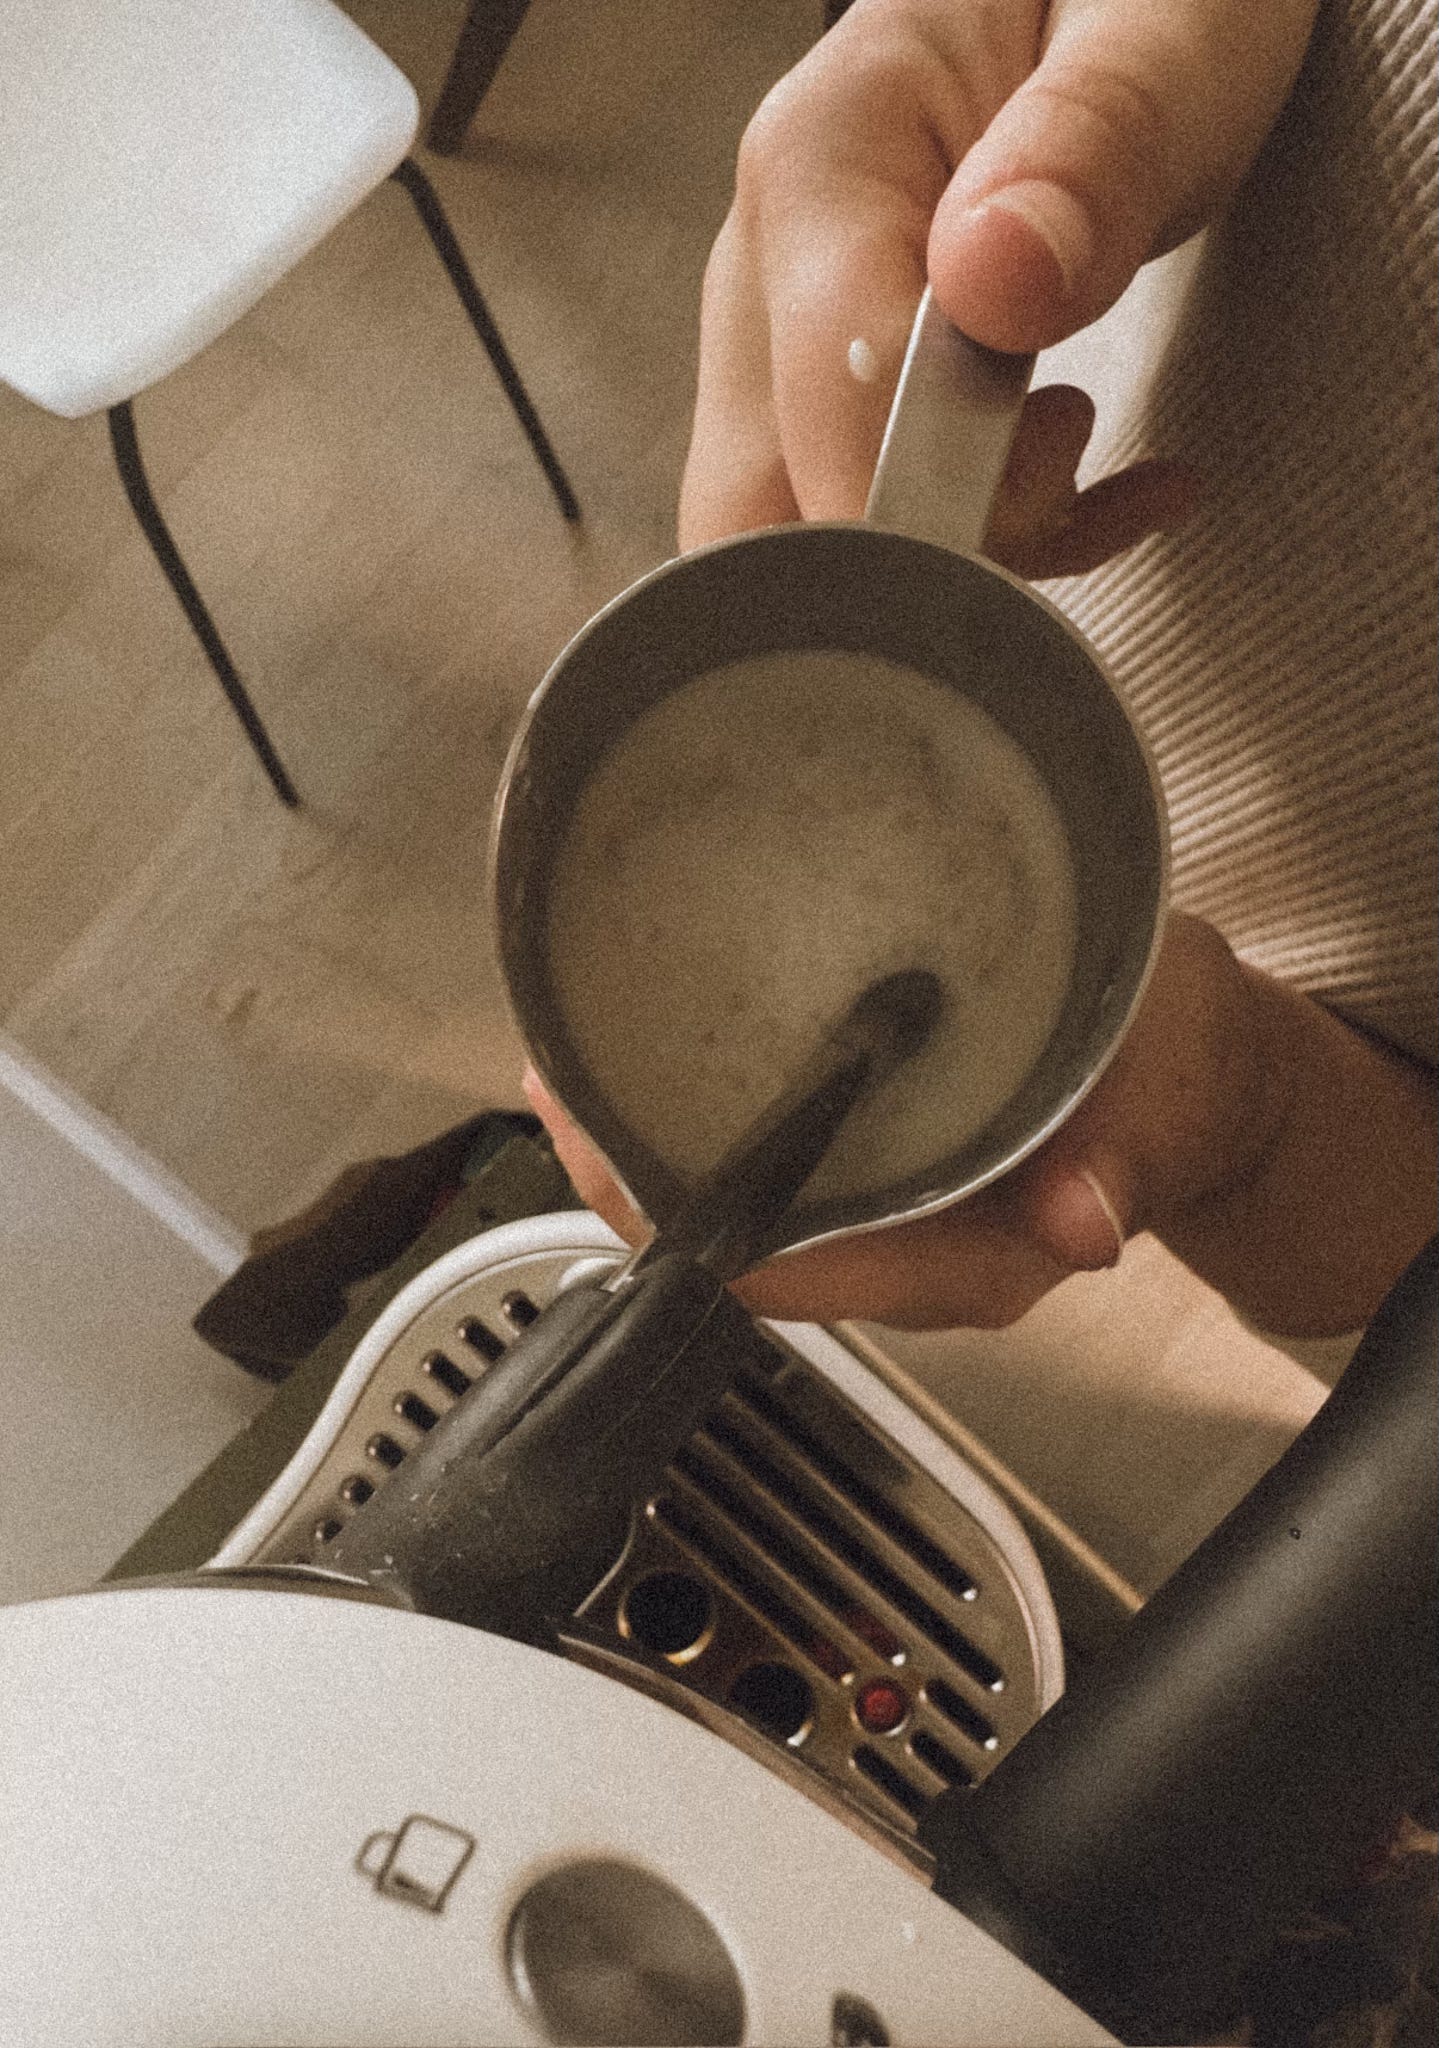
Insert the steam wand into the top half of the pitcher, near the spout. Think about the pitcher in terms of quadrants — 4 sections. The steam wand should be in the left or right top quadrant depending on which feels most comfortable to you. Lower the pitcher until the milk just barely covers the tip of the steam wand.
You should hear a soft paper-tearing sound.
Add air for 2–4 seconds only.
If you keep stretching the milk longer than that, you’ll create thick, dry foam instead of silky microfoam. Some people love this type of texture, and if that’s you, enjoy! But know that latte art will be very difficult to make with this type of milk texture.
Step 3: Create a Whirlpool
After adding air, raise the pitcher slightly so the steam wand sits deeper in the milk.
Now you’re no longer adding air — you’re incorporating the bubbles you just created.
You want the milk to spin in a smooth whirlpool.
This motion breaks down larger bubbles and creates that glossy, paint-like texture that makes latte art possible.
If your milk isn’t spinning:
Adjust the angle of the pitcher.
Make sure the wand is slightly off-center.
Keep the tip submerged (no screeching sounds!).
Step 4: Stop at 140–150°F
Most specialty coffee shops will serve your lattes at this temperature range. It’s perfect for sipping right when it’s served! Much hotter and the milk will break down and loose its creaminess and you’re likely to burn your tongue. Much cooler and you’ve got a lukewarm drink.
If you have one and want to reach an accurate temperature, use a kitchen thermometer. Place it in the pitcher while you’re steaming and stop when you reach 150F.
If not, use your hand following this simple guide:
Hold the base of your palm against the pitcher.
When it becomes too hot to comfortably hold, remove it.
Keep the steam wand going for about 5 more seconds.
That usually lands your milk in the 140–150°F range! Everyone’s heat tolerance and steaming equipment is different so if you have a thermometer, test this trick out and see if it works for you.
After steaming:
Tap the pitcher on the counter to pop any visible air bubbles.
Swirl the milk until it looks like wet paint — glossy, smooth, and unified.
If it looks separated or foamy on top, keep swirling.
Now you have the perfect texture for art!


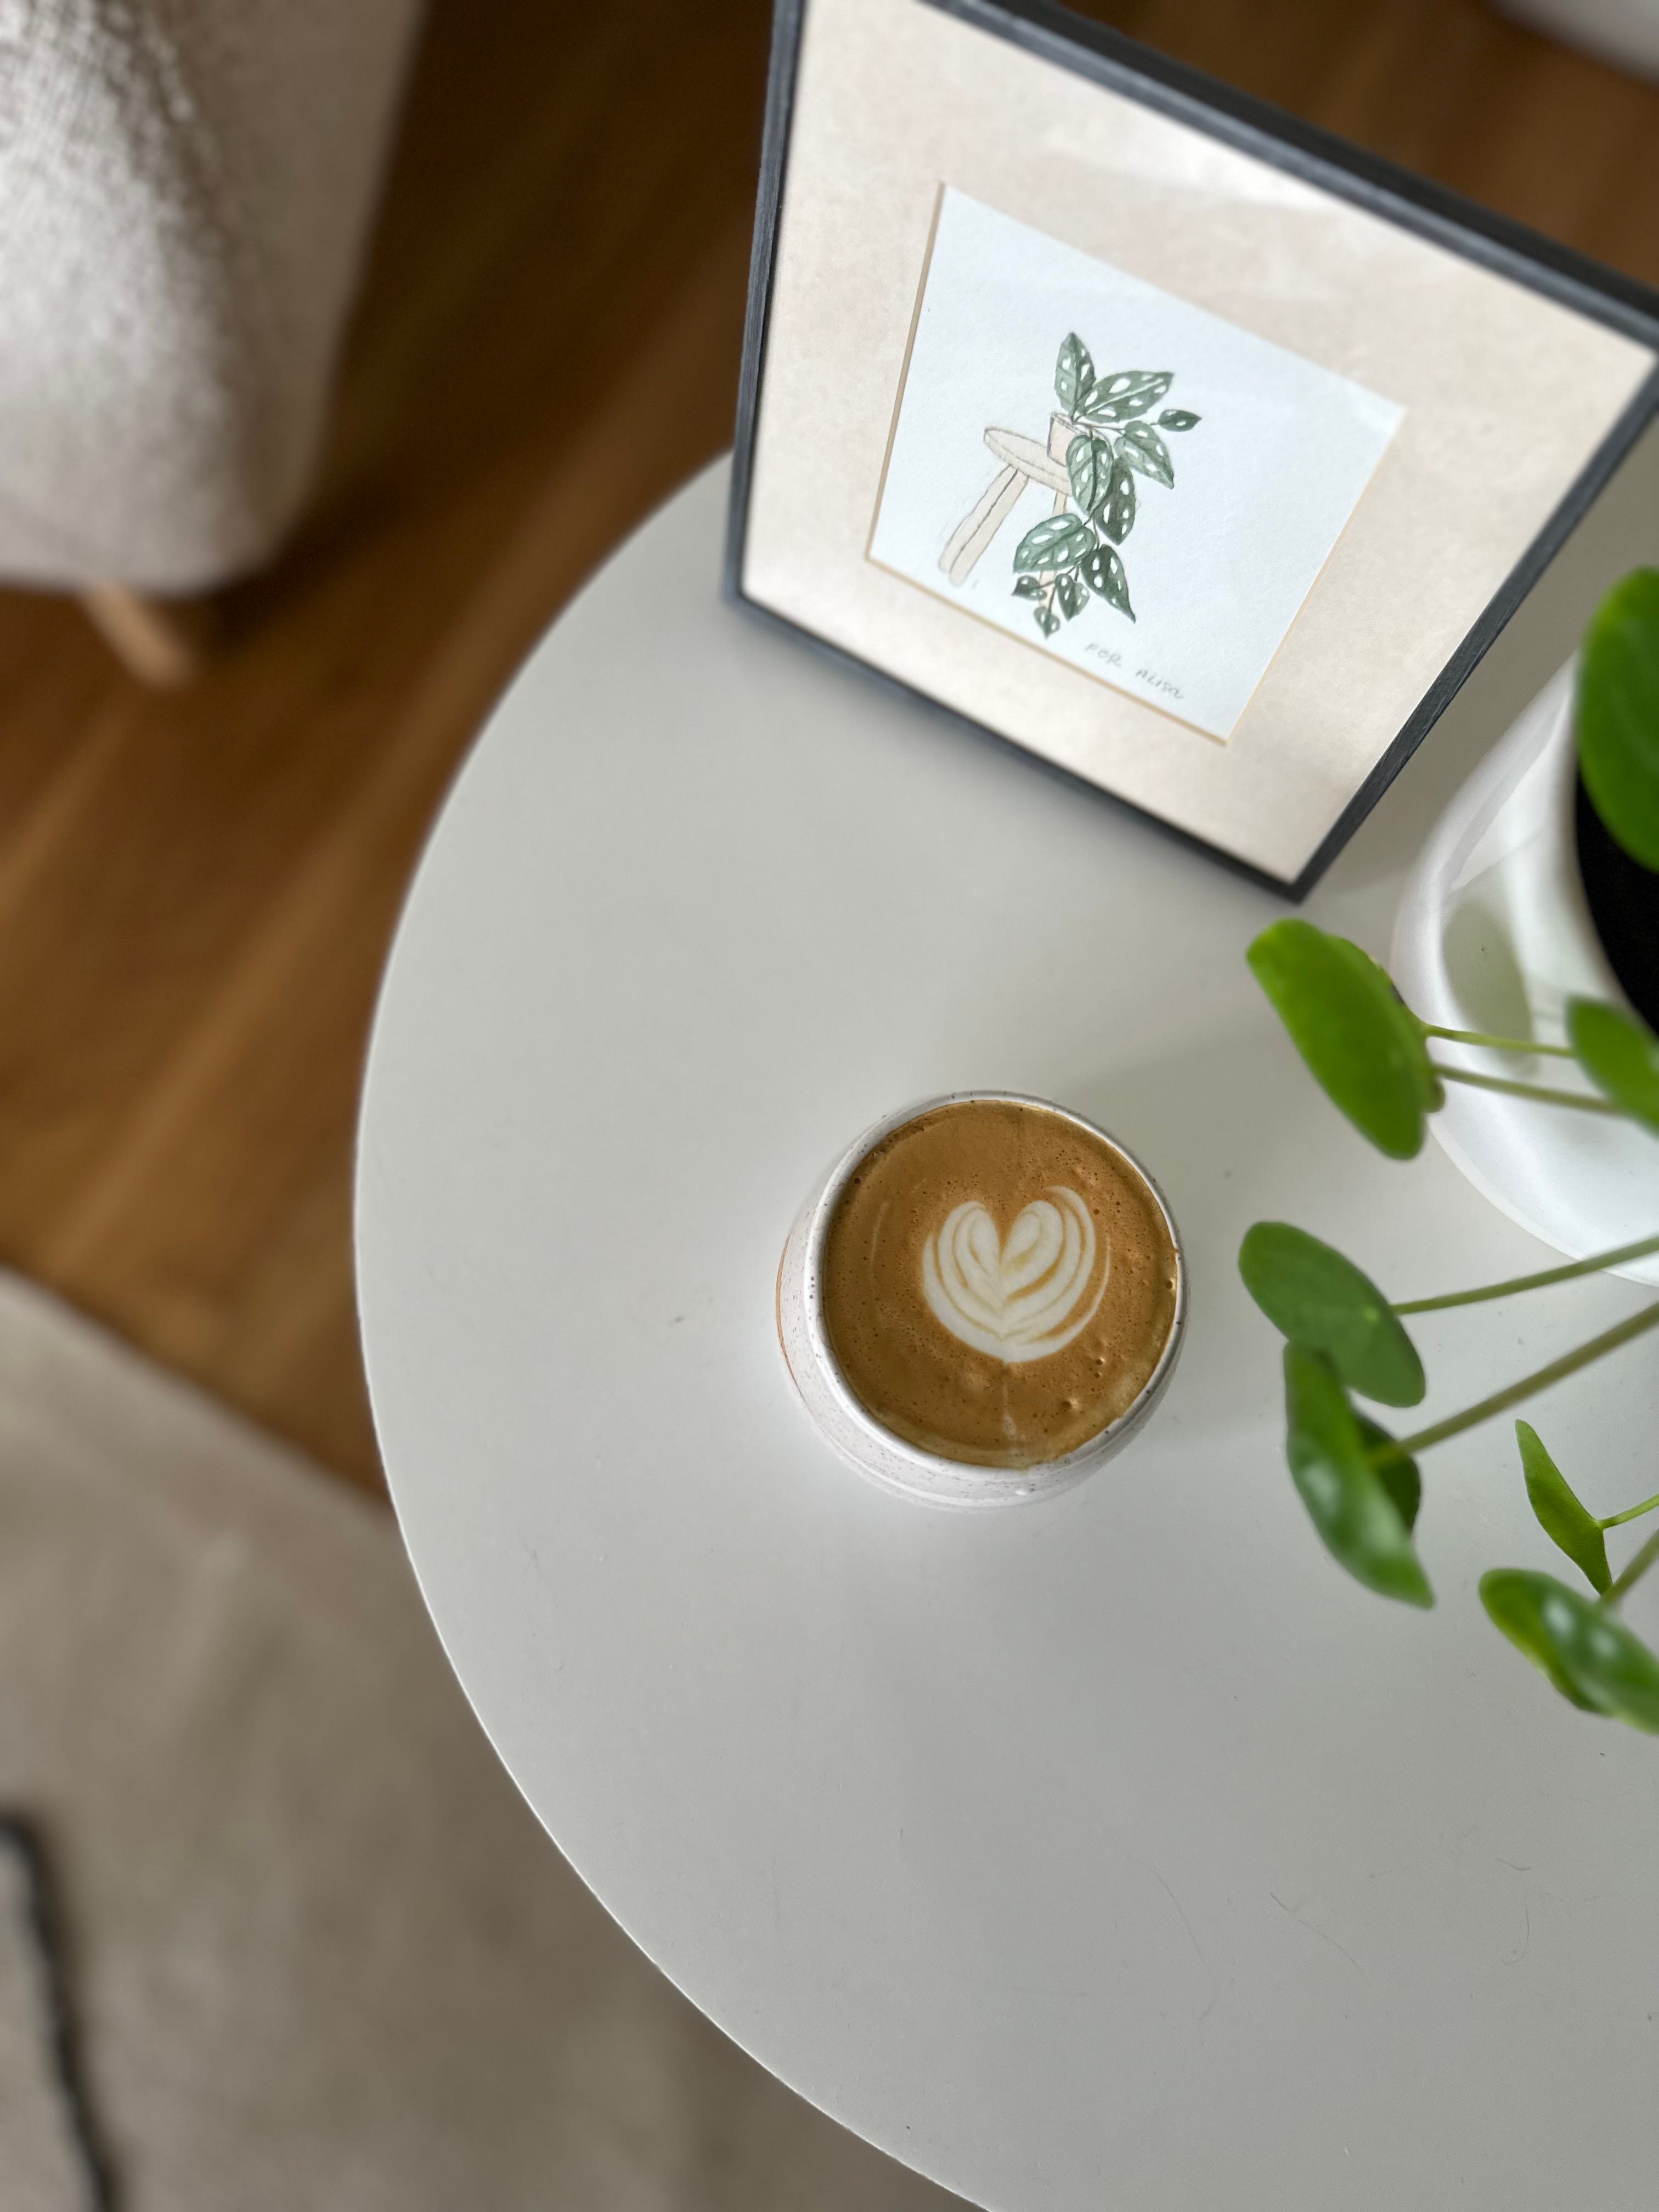
Let’s Start with a Simple Heart
Hearts are the foundation of most latte art. Once you can pour a heart, everything else becomes easier.
Here’s how:
1. Tilt the Mug
Tilt your cup slightly toward the pitcher. This helps the milk integrate with the crema instead of sitting on top.
2. Start High, Pour Steady
Hold the pitcher higher above the cup.
Pour into the center at a medium, steady flow.
At this stage, you’re mixing milk with espresso — not creating design yet.
3. Lower and Pour Faster
When the cup is about 2/3 full, bring the pitcher close to the surface — as close as you can without touching.
Increase your pour speed slightly.
You’ll see the white milk begin to sit on top of the espresso, forming a circle.
That’s your base.
4. Pull Through
When the cup is almost full:
Lift the pitcher slightly.
Slow your pour.
Drag a thin stream through the center of the circle.
That’s your heart.
It might look messy the first time. Or the tenth time.
That’s okay.
A lopsided heart still tastes amazing. Promise.
A Few Troubleshooting Tips
If your milk looks bubbly and thick:
You added too much air. Shorten the time you add air at the beginning.
If your milk looks flat and thin:
You didn’t add enough air at the beginning. Add a bit more (maybe 1 second)!
If your art disappears:
Your milk wasn’t close enough to the surface when pouring.
If your milk pours out in one big clump at the end:
Spend more time swirling the milk after steaming until it resembles wet paint. Pour immediately after achieving this texture. If the milk sits too long, the foam will start to separte and pour out in a clump.
If your milk won’t spin:
Adjust the angle of the pitcher — the whirlpool is key. It helps make smooth milk.
Practice makes progress.
Keep trying each day and slowly you’ll improve. As a barista, I get to practice hundreds of lattes a day so I learn fast. But at home, the process is slow and steady and grows over time.
If making better latte art is your goal, I hope you enjoy the process and maybe laugh a little at the failures along the way (we’ve all made plenty of weird blob mistakes!).
Happy Valentines Day, friends. I hope you take today (and maybe every day?) to celebrate the love you have in your lives — whether family, friends, romantic partners, or pets — it all counts, and it’s all what we’re doing this thing called humanity for.
Because the only thing more powerful than hate is love ❤️